-
 Asset Theme Documentation
- Dlisting – Real Estate WordPress Theme
- Fabio Wood Documentation
- Rave Theme Documentation
- Singleland – Product Landing WordPress Theme
- Terra Theme Documentation
- Input
- Muffle – WordPress Documentation
- DDoc Documentation
- Medishop
- Fundly
- Donority
- Carspa
- Niro -WordPress Documentation
- Whal Documention
- Kidzo WordPress Theme
- Sparch WordPress Theme
- Flyn Documentation
- Saasland Documentation
- Denzel Documentation
- Rave Documentation
- Makro Creative WordPress Theme For Saas & Startup
- Coro
- Motodeal Documentation
- Oppi WordPress Theme Documentation
- Filix WordPress Documentation
- Zix WordPress Theme
- Mak WordPress Theme
- Appart WordPress Theme
- Appland WordPress Theme
- Wavee WordPress Theme Documentation
- Home
- Docs
- Kidzo WordPress Theme
- Theme Settings
- Header Settings
Header Settings
Estimated reading : 2 minute
Elements of Header Settings:
Preloder Setting
You can turn off or on the preloader by Active/Inactive from the Theme Settings > Header Settings > Preloader Settings > Logo

Set Up Logo
You can upload your logo in the Kidzo Themes Settings. If the logo is not uploaded, then your site name will be used.
Please, follow the steps below to set your logo:
Step 1 – Login to your WordPress Dashboard.
Step 2 – Go to Theme Settings > Header Settings
Step 3 – Set your logo by clicking on Upload (our current Kidzo logo is 160px x 43px).
Step 4 – Set your Retnia logo by clicking on Upload (our current Kidzo logo is 320px x 85px).
Step 5 – If you want then you can also customize the logo dimensions & Padding under the Header Settings.
Step 6 – Click on Save Changes to save your logo and it’s done.
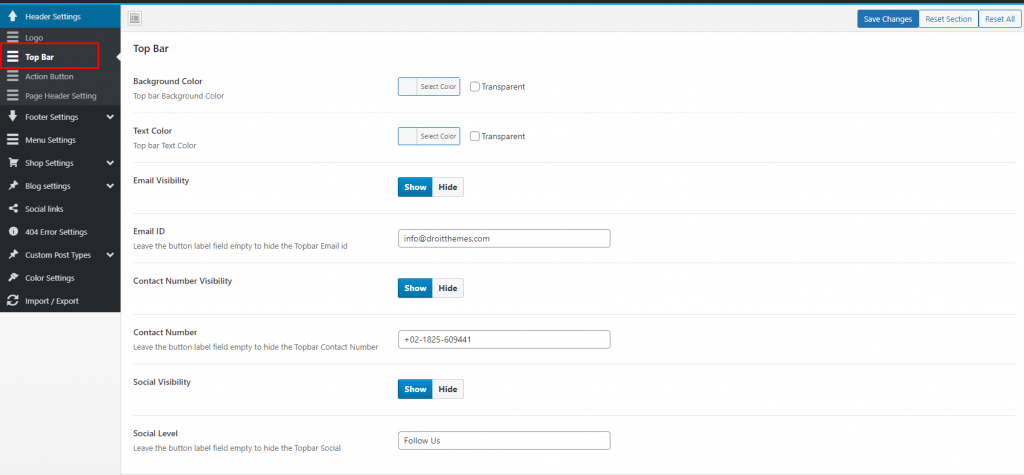
Top Bar
To customize the Top Bar section of the Header navigate to Dashboard > Theme Settings > Header Settings > Top Bar.
You can change the background color, text color by simply click on the select color and choose your desire color.
Easily Show/Hide Email Id, Contact number or Social CTA Level by clicking on the Show/Hide button.
N.B.: To customize the social icons links please check here.
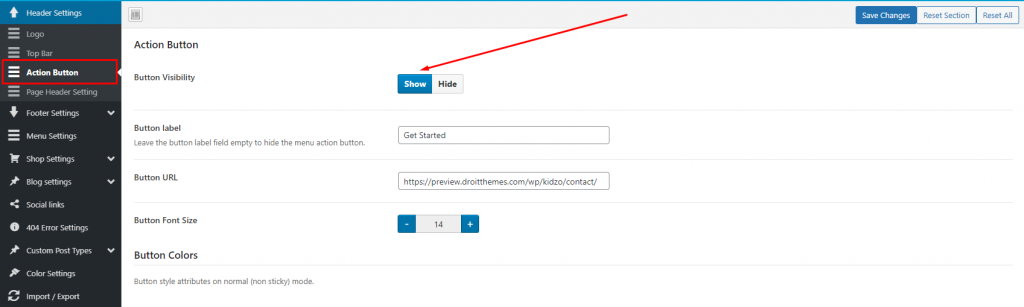
Action Button

To add or customize the Action Button in the Header navigate to Dashboard > Theme Settings > Header Settings > Action Button.
Page Header Setting
You can upload different header in the Kidzo Themes Settings.
Please, follow the steps below to set your Header Background Image:
Step 1 – Login to your WordPress Dashboard.
Step 2 – Go to Theme Settings > Header Settings > Page Header Settings
Step 3 – Set header image by clicking on Upload (our current header image is 1920px x 400px).

Step 4 – Enable the Show button in the Animation Images if you want to display the animation object in the header image.
