Header
-
 Asset Theme Documentation
- Dlisting – Real Estate WordPress Theme
- Fabio Wood Documentation
- Rave Theme Documentation
- Singleland – Product Landing WordPress Theme
- Terra Theme Documentation
- Input
- Muffle – WordPress Documentation
- DDoc Documentation
- Medishop
- Fundly
- Donority
- Carspa
- Niro -WordPress Documentation
- Whal Documention
- Kidzo WordPress Theme
- Sparch WordPress Theme
- Flyn Documentation
- Saasland Documentation
- Video Tutorials
- Getting Started
- Plugins Installation
- Pre-Built Demos
- Header
- Footer
- Widgets / Sidebars
- Menu
- Theme Settings
- Custom Post Types
- Pages
- Saasland Elements
- General
- Subscribe Form
- Services and Features with Shapes
- Integrations Solar System
- Integration with Buttons
- Row Integrations
- Pricing Table
- Pricing Table Tabs
- Pricing Table Tabs and Carousel
- Saasland Navbar
- Hero Section
- Hero CRM Software
- Two Columns Features
- Services
- Call to Action
- Client Logo
- Features
- Bubble Features
- Prototype Features
- Saasland Tabs
- Tabs with Icon
- Blog Post
- Saasland Testimonials
- Bubble Testimonial
- Testimonial with Rating
- Testimonial Single
- Paired Image
- Horizontal Tabs
- Features with Shapes (Dark)
- Features with Images (Dark)
- Features with Images (White)
- Stats Counter
- Circle Counter
- Curve Counter
- Hero Mobile
- Hero SEO
- Hero Integrations
- Hero Video Slides
- Hero with Background Image
- Saasland Carousel
- Download Section
- Team
- Saasland Map
- Processes
- Image Hotspots
- Filterable Portfolio
- Masonry Portfolio
- Jobs
- Icon Box
- Feature Videos
- Single Feature
- Saasland Icon
- Dual Icon
- Check URL Form
- Posts Carousel
- Image with Shape
- Saasland Slider
- Serialized Features
- Saasland Alerts
- FAQ with Tabs
- Pricing Plan Comparison
- App Hero
- Call to Action with Image
- Screen Features
- Pricing Table 02
- App Info
- Testimonial Style
- Features Section
- Single Video 02
- Tilt Image
- Single Info with Icon
- Shop Categories
- Products (Grid View)
- Ticket Price Plan
- Hero ERP
- Icon with Featured Image
- Domain Search Form
- Locations
- Table Tabs
- Text Button with Icon
- Parallax Images
- Date Countdown
- Event Schedule Tabs
- Progress Bar (Saasland)
- Saasland About
- Products (Saasland)
- Heading (Saasland)
- Forms (Job Apply, Contact)
- WooCommerce
- One page
- FAQs
- How to Paginate a Post?
- How to set site favicon?
- How to change author avatar?
- How to customize theme using child theme?
- How to Apply Custom CSS Code?
- How to make the blog page full-width?
- How to update premium plugins?
- How to change the footer moving objects?
- Does Saasland include Elementor Pro?
- How to create and apply a custom header for a specific page?
- How to create and apply a custom footer for a specific page?
- How to get FAQ widget as per demo?
- How to set a blank navigation menu for a particular page?
- How to set a side-bar widget on the Shop page?
- How to change “Page Attributes” for different page templates?
- How to fix the “Invalid Security Credentials” issue in the Theme Settings?
- How to change or add a portfolio social share icon?
- How to resolve demo import error (500)?
- What is the easiest way to translate Saasland widgets using WPML plugin?
- How to solve the issue of logos appearing twice?
- How to change the Title-Bar subtitle text and color?
- How to customize Action Button for a specific page?
- What to do if you can not edit with Elementor In the Saasland theme?
- How to fix if the logo is not appearing?
- How to fix if the logo appears broken?
- How to fix if the logo appears blurry? – SVG version, select width only
- How do you change nav-menu style for the particular page?
- How to fix if the main and sticky logo are the same?
- Elementor
- Create a new page
- How to enable Elementor editor for different custom post types
- How to move an Elementor section to another page
- How to create Full-width Sections, Pages with Elementor
- How to import Elementor Template
- How to disable Elementor default color and fonts?
- Elementor custom CSS classes
- Can’t edit Elementor popup with Saasland?
- Custom Header Template
- Can not edit the footer template?
- Elementor Widgets
- Dark Mode Settings
- Quick Links
- Tips / Guides / Troubleshoots
- Image Optimization
- Language Translations
- Get MailChimp Newsletter Form Action URL
- Speed up your WordPress website with SaasLand
- Not getting the new Elements / Sections
- Menu Color, Action Button colors are not changing!
- How to change the footer moving objects.
- How to customize the Title-bar Banner
- Theme Settings / Options Error
- Missing style sheet error when installing the theme
- Theme Updates
- Change Logs
- Denzel Documentation
- Rave Documentation
- Makro Creative WordPress Theme For Saas & Startup
- Coro
- Motodeal Documentation
- Oppi WordPress Theme Documentation
- Filix WordPress Documentation
- Zix WordPress Theme
- Mak WordPress Theme
- Appart WordPress Theme
- Getting Started
- System Requirements
- Theme settings
- Sidebar / Widgets
- Tips/Guide
- How to (FAQs)
- How to update the theme?
- How to set site’s favicon?
- How to change Author Avatar?
- How to apply custom CSS and JavaScript code.
- How to link one-page menu item with a specific section?
- How to use/enable RTL version?
- How to make the particle moving elements more visible?
- How To Locate Mailchimp Newsletter Form Action URL
- How enable particle effect on Hero section background?
- How to create/compose a new page with Elementor?
- Troubleshoots
- Contact Form
- Dark Mode Settings
- Changes Log
- Quick Links
- Appland WordPress Theme
- Wavee WordPress Theme Documentation
- Home
- Docs
- Whal Documention
- Header
Header
Estimated reading : 1 minute
Step 1
To start building a header, visit your WordPress Dashboard > Header Footer > Headers > Add New From here, you can create as many headers as you require.
You can add your header title from here and do make sure that you have the template option selected to “Elementor Canvas“ and hit publish.
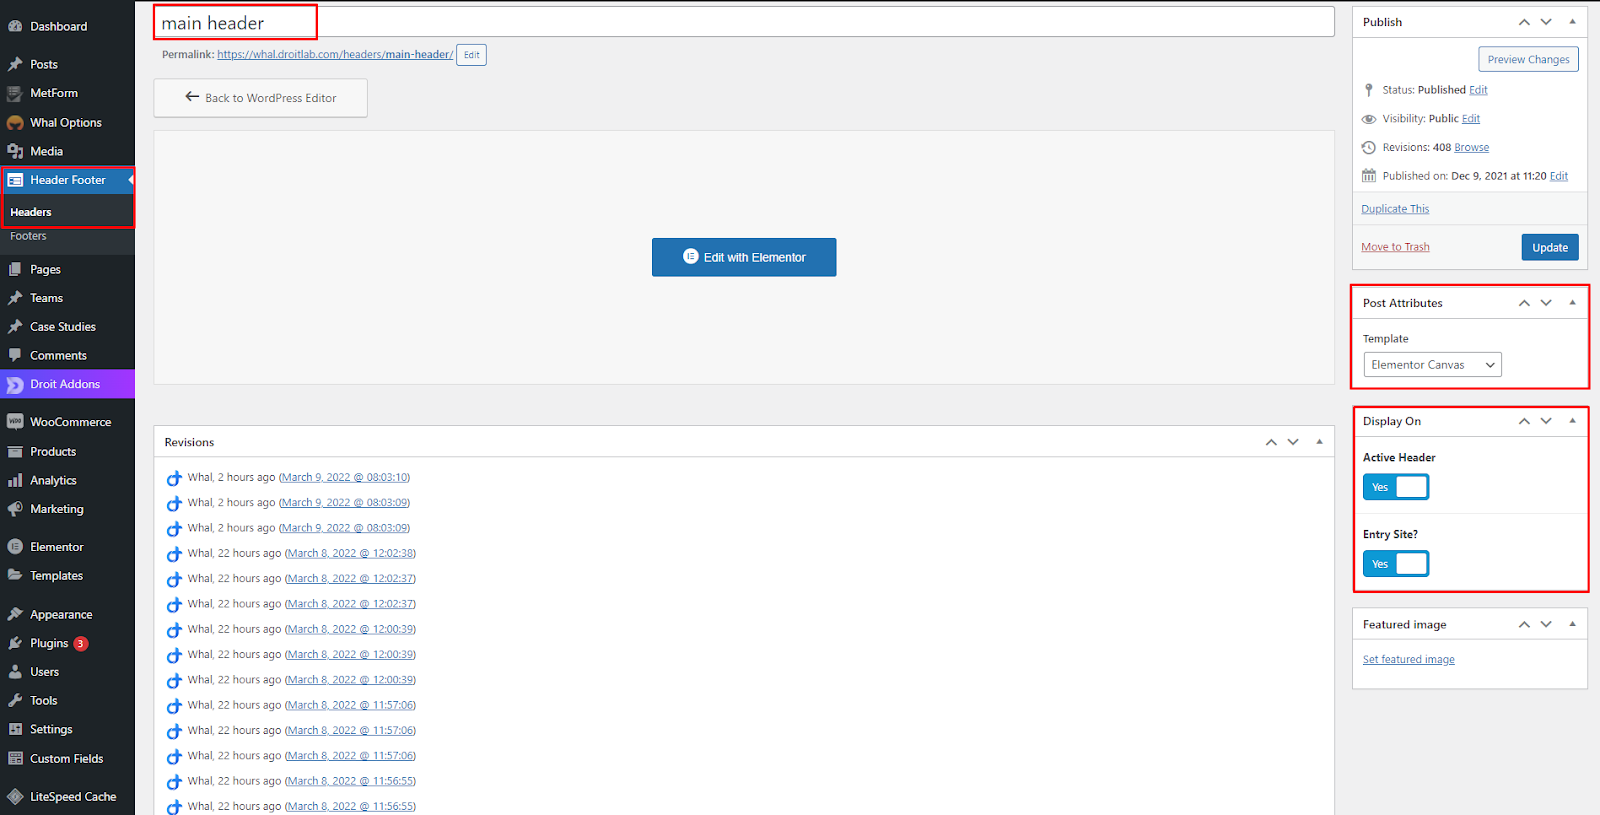
You can also make it visible on your entire website or on specific pages by toggling on and off from the sidebar “Display On“ option and selecting your preferred pages.
Step 2
To customize your Header further, go to Whal Options.
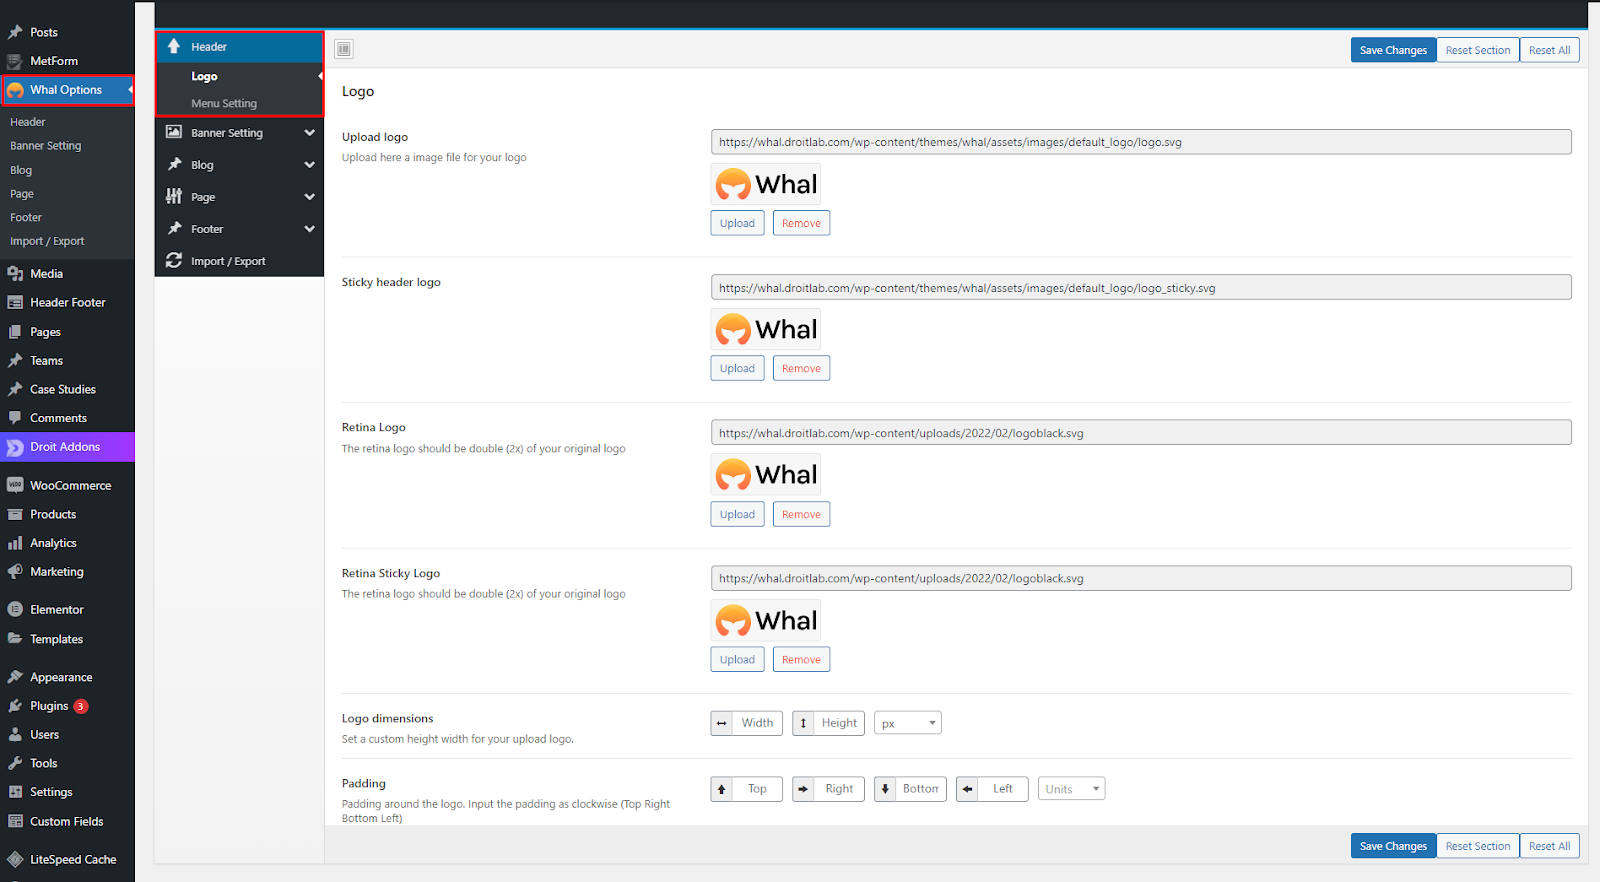
From the Whal Header menu, you can add your website’s logo, sticky logo retina logo and so much more.
After you’re done press Save Changes, to see site-wide changes take effect.
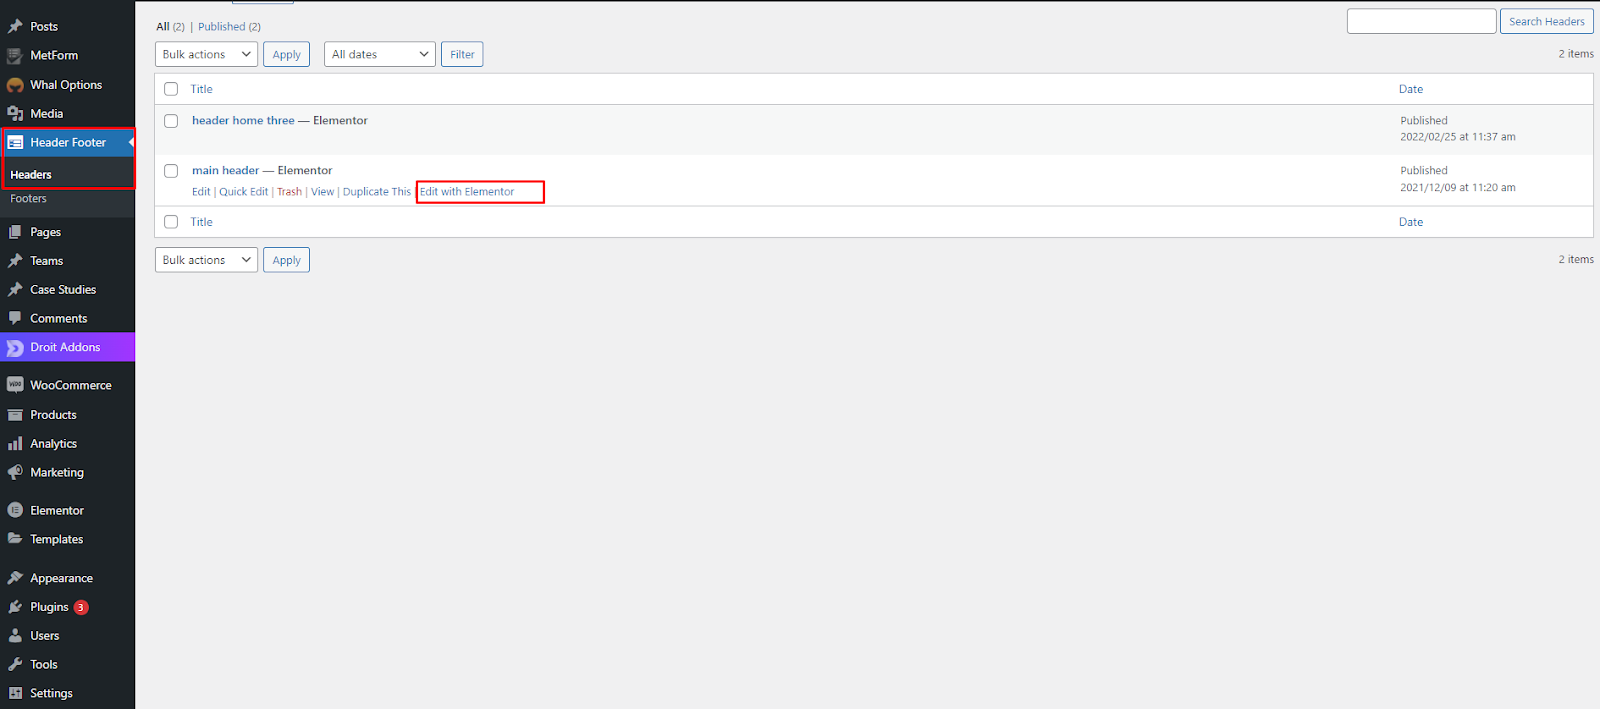
Step 3
Now to add content to your Header, visit your WordPress Dashboard > Header Footer > Headers > Header and click on the Elementor page builder button.
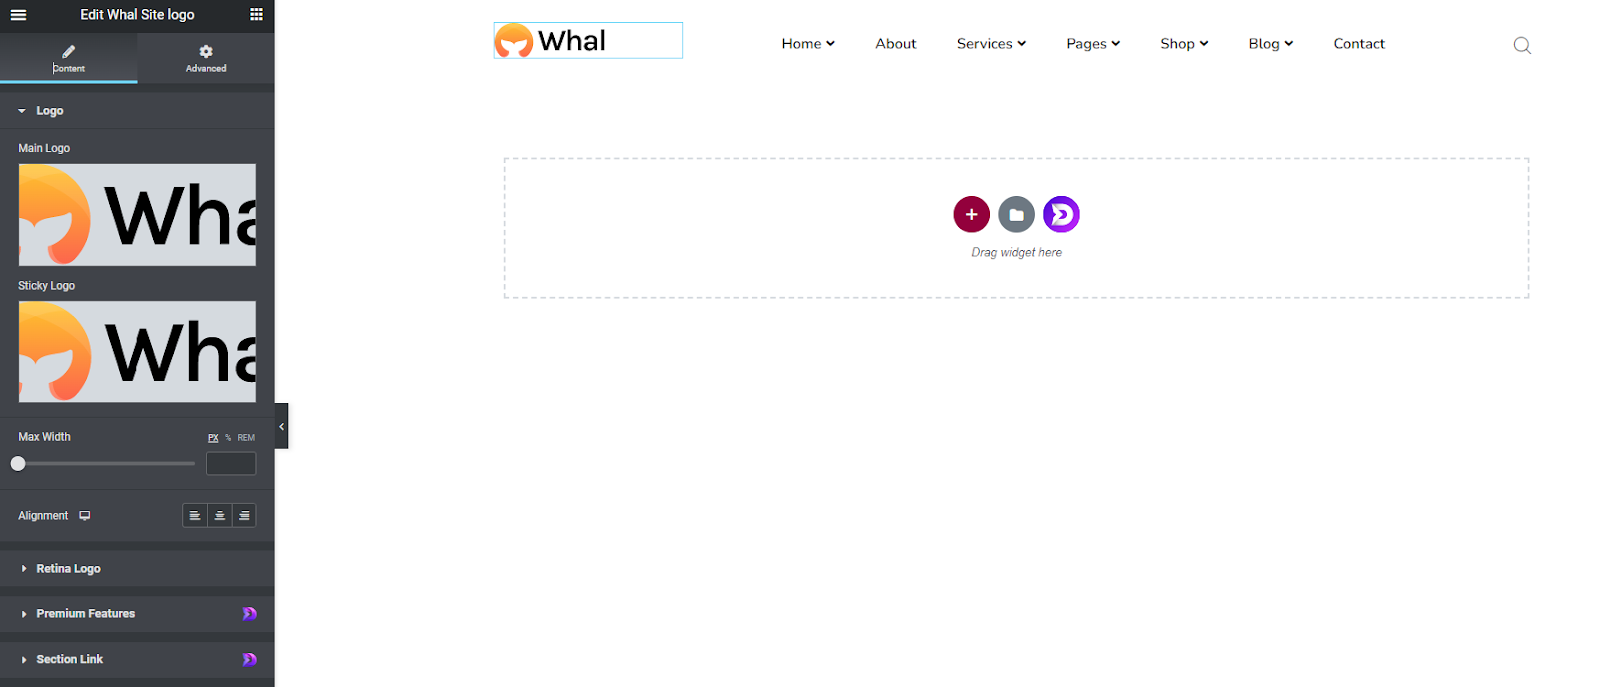
You can utilize widgets from Elementor or Droit Addons for Elementor to add content to your Header section. For example, we’ve added our header menu by utilizing the Whal Menu widget.

